Get the job done with Hagmans
Get the job done with Hagmans
Discover all our guides gathered in one place. Here you will find clear instructions, smart tips, and inspiration to help you use Hagmans products the right way. Whether it’s painting, spray application, or vehicle care for a safe and long-lasting result.
Paint furniture
1. Clean
Remove dust, dirt, and grease with a mild detergent. Wipe with a damp cloth and allow the surface to dry completely.
2. Sand and prime
Sand down uneven areas and dull glossy surfaces with sandpaper. Carefully remove sanding dust. Then apply a primer suitable for wood.
3. Fill as needed
Fill cracks or small holes with wood filler. Allow to dry, sand smooth, and prime the repaired areas.
4. Sand between coats
Once the primer has dried, lightly sand with fine sandpaper to achieve a smooth surface.
5. Paint
Paint the furniture twice with a topcoat for joinery or furniture. Allow drying between coats. For best results – paint in the direction of the wood grain and avoid going back over wet paint.
Paint trims, doors and joinery
1. Clean
Remove grease and dirt. Remove any loose paint if the surface has been previously painted.
2. Sand and prime
Dull glossy surfaces and sand away uneven areas. Remove dust. Prime with a joinery primer for good adhesion.
3. Fill and sand between coats
Fill any damage with filler. Allow to dry and sand smooth. Sand lightly after priming.
4. Paint
Paint in the direction of the wood grain using a brush or small roller. Work quickly and evenly. Apply two coats for a durable result.
Paint ceilings
1. Prepare
Cover floors and furniture. Ensure the ceiling is clean, dry, and free from dust.
2. Clean and repair
Wash away stains, soot, or nicotine. Fill cracks and uneven areas. Sand the surface smooth once the filler has dried.
3. Prime if needed
If the ceiling is stained or previously untreated – apply primer first.
4. Paint
Start by painting along edges and corners with a brush, then use a roller for larger areas. Paint at an even pace, one section at a time. Apply two coats for best coverage.
Paint walls
1. Prepare
Cover floors and furniture. Remove nails, wipe away dust, and fill holes or cracks.
2. Sand and clean
Sand filled areas and remove sanding dust.
3. Prime if needed
If the surface is stained, newly filled, or previously untreated – use a primer.
4. Paint
Stir the paint thoroughly. Start with edges and corners using a brush. Then paint the walls with a roller in even strokes, from top to bottom. Apply two coats for an even result.
Paint floors
1. Clean and prepare
Wash the floor thoroughly to remove dirt, grease, and previous coatings. Allow it to dry completely.
2. Sand
Dull the surface with sandpaper or a floor sander. Remove all sanding dust.
3. Prime if needed
If the floor is untreated wood or concrete – apply primer first.
4. Paint
Paint with a roller in long, even strokes. Apply two thin coats and allow proper drying between coats. Avoid walking on the surface before the paint has fully cured.
Paint windows
1. Prepare
Remove loose paint and any old putty. Clean away dirt and dust. It is important that the putty is intact so that moisture cannot enter.
2. Sand and prime
Sand uneven areas with sandpaper. Dull remaining paint and round off the rebate edge to make it easier to smooth the putty during application. Clean the glass with denatured alcohol where the putty will adhere. Then prime exposed wood to protect against moisture.
3. Re-putty if needed
If the window putty is cracked or loose – remove it and apply new putty. Allow the putty to dry before painting.
4. Paint
Paint the edges first, then the frames. Extend the paint approximately 1 mm onto the glass to seal the putty. Apply two coats and allow proper drying between coats.
Paint exterior roofs
1. Safety first
Use anti-slip protection, safety lines if needed, and ensure ladders and scaffolding are stable. Never paint a wet or slippery roof.
2. Cleaning
Wash the roof thoroughly with roof or facade cleaner to remove dirt, algae, and moss. Rinse well and allow the roof to dry completely.
3. Pre-treatment
Brush away loose paint and rust. Treat rust-affected areas with rust protection and replace damaged tiles or sheet metal parts if needed.
4. Prime
Prime exposed surfaces with a primer suitable for the roof material (metal or concrete). This improves adhesion and durability.
5. Paint
Paint the roof with two coats of roof paint. Work from top to bottom and paint entire sections in one go to avoid overlaps. Allow the paint to dry between coats.
Spray painting
1. Prepare the surface
Clean the surface from dirt, grease, and dust. Lightly sand for better adhesion and wipe clean thoroughly.
2. Mask
Cover surrounding areas that should not be painted with plastic or masking tape. Ensure you work in a well-ventilated space.
3. Shake the can
Shake the spray can thoroughly according to instructions, usually 1–2 minutes, so the paint mixes evenly.
4. Spray
Spray in thin, even layers at a distance of approximately 20–30 cm. Start and finish each stroke outside the surface for an even result.
4. Build up the paint
Apply several thin coats instead of one thick coat. Allow the paint to dry between layers according to recommendations for best finish and durability.
Paint concrete floors
1. Clean
Clean the concrete floor thoroughly from dirt, grease, and oil residues with an effective cleaner. Rinse well and allow the floor to dry completely.
2. Prepare the surface
Sand or etch the concrete to open the pores and improve paint adhesion. Vacuum and remove all dust.
3. Repair if needed
Fill cracks and cavities with concrete filler. Allow to dry and sand smooth before painting.
4. Prime
Prime the floor with a primer suitable for concrete to ensure good adhesion and an even final result.
4. Paint
Paint the concrete floor with two coats of concrete or floor paint. Allow drying between coats and avoid load until the floor has fully cured.
Five steps for a successful coating
There are several things to consider to achieve a successful coating. Follow our 5 steps to give yourself the best conditions for reaching the result you want!
1. Clean
Always clean before starting. Silicone remover removes all dirt and silicone residues. Use before and after sanding to achieve the best result.
2. Protect
Are you coating metal? Start with a rust protection primer.
Choose between Epoxy, Etch primer, or 1K Rust Protection depending on the material. If coating plastic, use plastic primer for best adhesion.
3. Prime
Before applying color, use primer or spray filler. This increases layer thickness, provides a good sanding base, and enhances the color.
(Example: Yellow color = light base)
4. Paint
Now it’s time for the color coat. Use Multona or SprayMax for cars and Hagmans or Belton RAL for other applications. Regardless of your choice, you get fast drying time and excellent coverage.
5. Clear coat
Clear coat provides increased protection and more depth in the color. Hagmans offers both gloss and matte clear coats. Some paints, such as metallic and water-based paints, require clear coat. For best protection, use SprayMax 2K clear coat, which withstands petrol and stronger degreasers..
• Always clean thoroughly and finish with silicone remover
• Aim for a smooth transition to existing paint
• Apply several thin cross coats at 25 cm distance
• Larger surfaces are best coated with a nozzle that provides a wide spray pattern
Wash & Wax
1. Assess the car’s condition
Start by checking how dirty the car is and the condition of the paint. If there are asphalt spots, fallout rust, salt, or a dull surface, more thorough preparation may be needed.
2. Degrease if needed
If the car is heavily soiled, apply degreaser to a dry surface. Work methodically and allow the product to act according to instructions before rinsing thoroughly with water. Repeat if necessary.
3. Wash the car
Wash with car shampoo and lukewarm water. Work from top to bottom to avoid dragging dirt over cleaned surfaces. Pay extra attention to trims, grille, mirrors, and other areas where dirt accumulates. Rinse thoroughly.
4. Dry and prepare
Dry the car thoroughly to avoid water spots. If the paint feels dull or has minor scratches, use a light polish before waxing.
5. Wax for protection and shine
Apply a thin, even layer of wax to a cool, dry surface. Let it dry until matte, then polish to shine with a clean microfiber cloth. Avoid working in direct sunlight or on hot surfaces for best results
Surface coating and Polish
1. Prepare the surface
A successful coating starts with careful preparation. The surface must be completely clean, dry, and free from grease and dust. Wash, degrease, and sand if necessary to create proper adhesion.
2. Mask and protect
Protect surrounding surfaces with masking tape and covering materials to avoid unwanted paint on adjacent parts.
3. Apply paint
Apply the paint in thin, even layers with a consistent distance from the surface. Several thin coats provide better coverage and a more durable result than one thick coat. Allow the paint to dry according to instructions between applications.
4. Polish if needed
Once the surface has cured, it can be polished to achieve extra gloss and an even finish. Work in smaller sections until the desired result is achieved.
Clean rims
1. Let the rims cool
Before starting cleaning, it is important that the rims are cool to avoid staining or the product drying too quickly.
2. Apply cleaner
Spray the cleaner evenly over the rim surface and allow it to work according to instructions to dissolve brake dust and dirt.
3. Agitate and rinse
If needed, use a brush to reach spokes and bolts. Then rinse thoroughly until all dirt and product are removed, preferably dry the rims for a spot-free result.
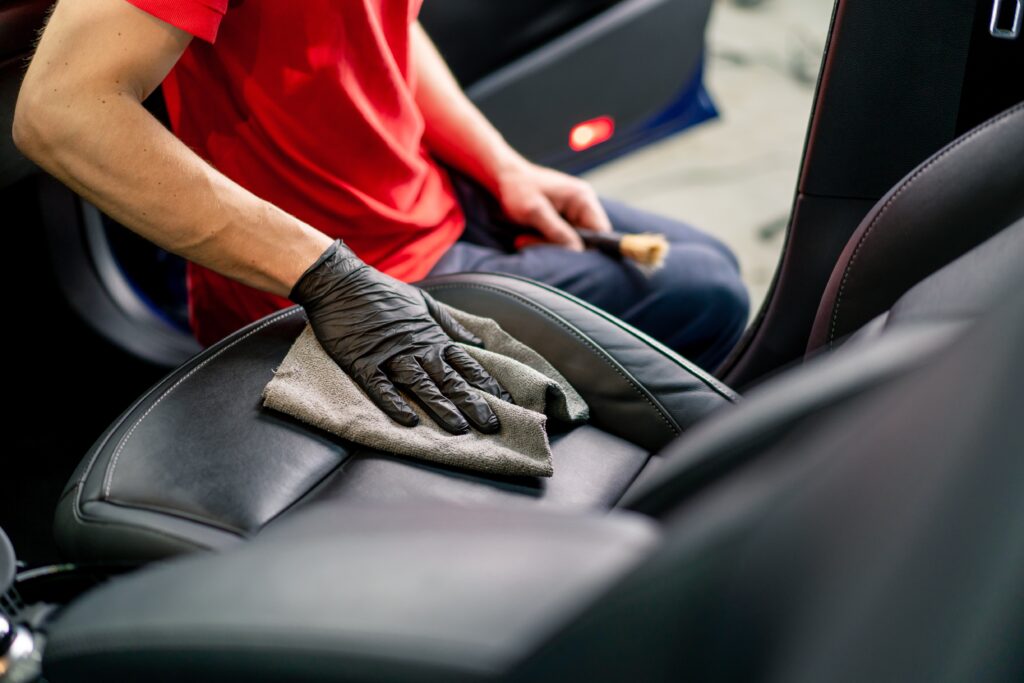
Interior care
1. Vacuum the interior
Start by vacuuming seats, floors, and mats to remove loose dirt and gravel that could otherwise cause wear.
2. Clean textile and plastic
Apply cleaner to textile surfaces and work it in with a brush if needed. Wipe off with a microfiber cloth and allow to dry. Plastic and panel surfaces are cleaned with a cloth to restore freshness and reduce static dirt.
3. Care for leather and details
Clean and condition leather with a suitable product applied with a soft cloth. Wipe off excess and allow the material to absorb the treatment. Rubber mats can be rinsed if needed and dried before being placed back.
Rust protection guide
Cavities
The most important feature of a thin rust protection product is that it is penetrating and can creep deep into all cavities and confined spaces. This is just as important as providing effective rust protection. Thin rust protection is primarily used for treating closed cavities such as beams, doors, and sills. It also works as a base for thicker rust protection products.
Undercarriage
To protect wheel housings and the undercarriage from mechanical impact, these surfaces should be treated with thick rust protection or underbody coating. For best protection, untreated surfaces should first be treated with thin rust protection before applying thicker coatings.
Underbody coating
Asphalt-based coating is used for rust protection and sound-dampening on the undercarriage, wheel arches, and more. It withstands chemicals such as cold degreasers and provides robust protection against splashes and stone chips.
Stone chip protection
On the most exposed parts of the vehicle or surface, a layer of stone chip protection should be applied. It is important that stone chip protection is always applied on top of an existing rust protection layer, such as thin or thick rust protection or rust protection primer. This ensures both corrosion protection and mechanical protection.
Rust protection primer / Primer
Rust protection primer is used on metal surfaces before applying stone chip protection or before painting. The primer provides additional rust protection and improves adhesion for the topcoat.
Stone chip products
Stone chip protection is available in different consistencies and can be applied to sills, front and rear panels, wheel arch edges, and other exposed parts. The products withstand degreasing washes and can be overpainted with standard coatings. Some variants are solvent-free and offer a more environmentally friendly alternative.
Wax-based rust protection
Wax-based products provide effective protection against rust and can be used on machine parts, tools, or surfaces that are to be transported or stored for long periods. The wax can be applied in areas such as luggage compartments or door seams and often provides a non-sticky surface.
Thin rust protection wax: A blend of wax and oil with low viscosity that provides good penetration into cavities, sills, and between sheet metal and beams. Can also be used on machine parts, tools, and equipment. Provides a slightly stickier surface than aerosol variants.
Transparent rust protection wax: Colorless and suitable where discreet protection is desired. Ideal for surfaces such as luggage compartments, door seams, machines, tools, etc.